Saturday, July 30, 2011

Saturdays with Jen: Digicards

Hi again, Jen here. Made it to another Saturday, one of my favorite days of the week! Did you see all of the awesome stuff flying around here this week? There were coupons and crafts, tips and layouts galore. It's been a pretty fun week at Danimoy Designs if I do say so myself. I've really enjoyed visiting the blog each day to see what the blog girls have up. Did you try out that gift card hybrid tag from Laina? Cute, right? Anyhow, today is the second in my blog series, digicards. For this (every 2nd and 4th Saturday), I'll use one of Dani's kits to make a card digitally. Typically, I'll make a card and then print it out to give, but I'm working on a tutorial for how to send a card that will open digitally. I haven't quite gotten there yet, but when I do, I'll let you know. Now, on to my first card.

Today I'm going back in time a bit, using a really unique kit of Dani's called Don't String Me Along. Have you seen this one?

How cute, am I right?

First things first, you need to choose a template. There are a number of ways to do this, but for today, we'll go with a very simple 4-fold. Start by creating an 8.5x11 canvas and place your squares as follows (I like to add squares of different colors so that I can see where my boundaries are. You can skip this if you prefer to just use the ruler to judge). Note that the top two panels need to be upside down in order to print properly.


Once you've got it setup, design away. Using Don't String Me Along, here is what I came up with. I'll show you page by page.


What a beautiful kit, isn't it? Well, that's all for today. You can find Don't String Me Along at Gotta Pixel. Hope you'll find time to make a digicard for someone sew special in your life too. See you next week!

Friday, July 29, 2011

Challenge Friday

Photobucket

Hi danimoy designs fans!
Want to win a $5 danimoy designs coupon!?!

Rules:
Each Challenge Friday will bring a new challenge for danimoy fans and readers to complete. For each challenge layout that you submit, you will gain one entry into the new monthly drawing for a $5 danimoy designs coupon!! Exciting right? Here's the directions:

1) Create a layout that meets the requirements for the challenge (you have 2 weeks to do it)
2) Upload it to the danimoy designs gallery at Gotta Pixel or Scrapbook Bytes
3) In the description of your layout, be sure to include proper credits of the danimoy kit you used and the date of the challenge.

Example:
Credits - Denim Daises by Danimoy Designs & A+ designs
Layout for danimoy designs 7/29 blog challenge

---------------------------------------------------------------------------------------------
7/29 Challenge: Use the template provided below to submit a layout using one of danimoy design's kits.


Photobucket

Download the Template here

Here are some CT inspirations for you :)

All Smiles by Me (kit: Denim and Daises)
Photobucket


Coffee by Monica (Kit: See You Latte)
Photobucket


Braden by Vicki (Kit: Bahama Mama)
Photobucket

Lazy Days by Arianna (Kit: Lazy Days of Summer)


Very Cute You by Marif (Kit: Slow Poke)


We can't wait to see what you create!!
Photobucket

Thursday, July 28, 2011

TIP of the Week: Rounding Corners

Have you ever wanted to add a little something, something to your page. How about rounding off some corners? You can do this with photos, papers, clipping masks, elements... the list goes on. There are several ways to do this, but here's one way that's pretty simple. I used PSE for Mac if you don't recognize the screen shots.

The first step is the choose the item that you want to have rounded edges. Stunning start to this tutorial, right? hehe (I've chosen this adorable photo of my daughter in her multiple hair bow phase as the example, just because it's cute) Then use the marquee tool to select a square or rectangle around your picture or paper.

Then in the drop down menu, choose Select - > Modify - > Smooth.

You will get a pop-up then. Not a bad one, I promise... You will need to choose a number of pixels. You can start with 50, although in my example I used 75.

The next part is the fun part. In your drop down menu choose Select - > Inverse then click your Delete button. Fun, huh?

Now, go to the menu and choose Select - > Deselect and you are done!

Before I leave, don't forget about Dani's awesome Christmas in July Bundle! There are SO MANY Holiday goodies in this bundle for a fantastic price (75% off). Seriously, you just have to check it out. Maybe you can even find an excuse to round some corners *wink*.


See you next week...


Wednesday, July 27, 2011

Bahama Mama Freebie!

Hi everyone. Jen here. By now I'm sure you've seen the delightfully tropical Bahama Mama that Dani's got in store now. Isn't it fun? I only wish I had more caribbean, pina colada, lounging on the beach in my hammock wearing flip flops photos to scrap with it, lol! Since I don't, I decided to make a couple of freebies for you instead. I couldn't decide on just one, so I've got a little combo for you including a cluster frame, a border, and a verse I found that fit this kit so perfectly, I couldn't resist including it. So without further ado, here is Bahama Mama and your Bahama Mama freebies. Just click on the image to download. Happy Wednesday everyone!

Tuesday, July 26, 2011

Bahama Mama

It's time for a brand new Duo-licious collab! Check out Bahama Mama on sale this week for just $3 and the matching splats are $2!
GP - SBB - SGD

Christmas in July Bundle

It's almost the 25th! So that means Christmas in July!! Oh what I wouldn't give for some colder weather right now! It's been over 100 degrees here! So right now you can grab all my Christmas kit's and add on's for just $10!! That's $1 a pack!!
GP - SBB - SGD
Coupon!
I don't know about where you are but it has been HOT here! To hot to go out and do stuff! I have a hot deal for you! The more you spend the more you save! So stock up on some awesome scrapping supplies to play with while you stay in the AC and beat the heat!
GP - SBB

Fan layout of the week


Hi. It's me again.
With a wonderful layout off one of you girls whom like Danimoy Designs kits.

This layout is called
Lazy Days and was made by Arianne


The picture and photo treatment is beautiful.
But I also like the little clusters in the corner.


Saturday, July 23, 2011

Saturdays with Jen

Happy weekend everyone. It's a sun-shiney day here in Oregon, and I hope it is for you too, wherever that might be. This is Jen here with my first blog post for Danimoy Designs. I'll be with you each Saturday and I hope you'll join me here too! I titled my blog post sessions 'Saturdays with Jen' (creative, right, lol). Each Saturday I'll have something new to share with you - twice a month I'll have a digicard made using one of Dani's awesome kits, and twice a month (starting today) I'll mix things up a little with something I call 1+1=3. Don't worry, I can do math. This is one of those special situations, though, where it actually does add up. For each 1+1=3 session, I'll show you two of Dani's kits. I'll then take a little of this and a little of that, mix it up, and voila, a new kit will emerge. Hence, one kit plus one kit equals three kits for you to work with. I hope that makes sense, but if not, don't worry, I'll show you what I mean.

The first step is to choose two kits that you would like to work with. These could be some of your favorite all time kits, or perhaps some that you just haven't used in a while. The best part is, they don't even have to be remotely similar for this to work. For my first session, I chose Dani's Owl Always Love You and Time of Your Life (which you can find in Dani's shop at Scrapbook Bytes here).

Aren't these the cutest?! Ok, so now I've got my 1+1, I need to mix it up and get my 3. Begin by choosing a color pallete. I LOVE the blue and white clouds in Owl Always Love You, and the blue and pink papers in Time of Your Life really jumped out at me. So, my color pallete is blue, white, and pink. Now it's time to mix it up. Go through each kit and separate out the papers and elements that match your new color scheme. Here's what I came up with for mine:
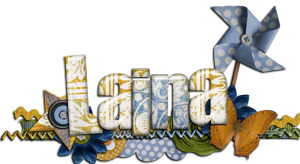
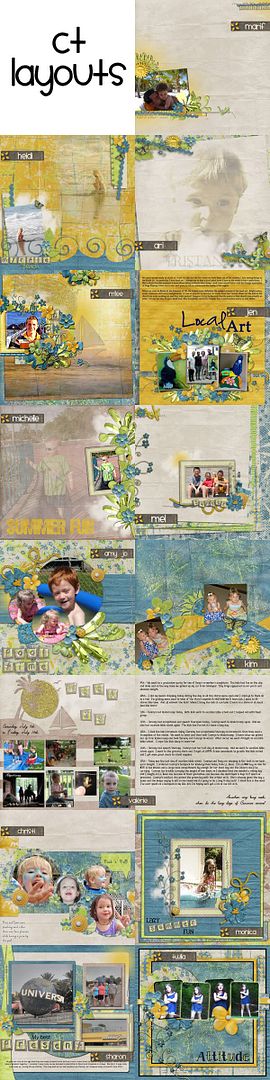
Isn't that awesome?! I was really pleased with the result. Now it's time to have a little fun. Scrap to your hearts content! I made a layout using my "new" kit and one of my absolute favorite photos. I was too young to remember this photo, and frankly most of the people in it. But it really means a lot to me to have this "memory" and I really felt that "Dare to Dream" was the perfect kit for it. Hope you think so too!

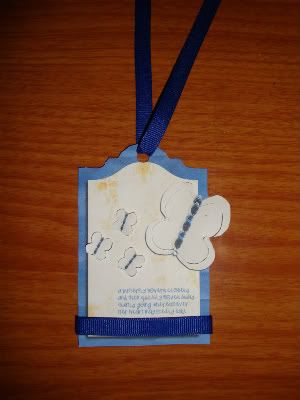
That's it for today. I hope you'll give it a try and I'd love to see what you come up with. I'll see you back here next week, same time same place with a special card to share.


Friday, July 22, 2011

Hot Summer Coupon!!

I don't know about where you are but it has been HOT here! To hot to go out and do stuff! I have a hot deal for you! The more you spend the more you save! So stock up on some awesome scrapping supplies to play with while you stay in the AC and beat the heat!

Hybrid Friday: Butterfly Gift Tag

Photobucket

Hi danimoy fans! Laina here, I am excited to bring you our blog's first Hybrid Post. In weeks to come, I will post hybrid posts twice a month on Fridays!!

Today we are going to make a buttefly tag, perfect for gifts, made with danimoy's Flutter found here at Gotta Pixel or Scrapbook Bytes.

To complete this project, you will need:
A scrapbooking kit of our choice
Template provided
A printer with color ink
White Cardstock
Ribbon (I will use a dark blue ribbon)
A hole puncher
Small scissors/Xacto Craft Knife
Pop-up glue dots


I have provided you with a template for the tag, which you can download by following this link: Download here


Photobucket


Once you have downloaded the template, you can open it up with Photoshop and begin adding your papers and elements.

Photobucket


I decided to leave out the top butterfly and the three smaller butterflies out of design for now. Instead of placing them digitally, I will print them out, cut and glue down with pop-up glue dots. I made the three smaller butterflies are about 1 sq. inch in size and the larger butterfly is about 1 1/2 sq. inch in size to print. In order to figure your sizes out, you can place them on the template to get an general idea of what size element you wish to have and then create a new document with them to print, separately like my below.

Photobucket


After printing on cardstock, let the tag and additional elements dry for at least 5 minutes. Now you are ready to start assembling the gift tag!

I cut out the butterflies, attached them with glue dots. I also decided last minute to add ribbon on top. Then I punched a hole at the top and threaded the ribbon through.

Here's my final butterfly gift tag!

Finished Tag

If you decide to use the template and one of danimoy's kits, we'd all love to see the results! You can post a photo of your completed hybrid project at one of her store galleries (Gotta Pixel or Scrapbook Bytes)

Photobucket

Thursday, July 21, 2011

Lazy Days of Summer


Lazy Days of Summer


Check out this brand new kit! It's perfect for those hot hot days like we keep having where you just want to hang around! Lazy Days of Summer is on sale this week for just $3!

GP - SBB - SGD


Flutter


My flutter collection is now available at all my stores and you can grab the whole bundle for just $6!

GP - SBB - SGD


Rock Star


You can also grab my Rock Star Collection at all of my stores now and you can snag the whole bundle for just $6!

GP - SBB - SGD


Christmas in July Bundle


It's almost the 25th! So that means Christmas in July!! Oh what I wouldn't give for some colder weather right now! It's been over 100 degrees here! So right now you can grab all my Christmas kit's and add on's for just $10!! That's $1 a pack!!

GP - SBB - SGD


Freebie!


And here's your freebie from the CT girls this week! From now on the freebies will be posted on the blog by my new blog team on Tuesdays so make sure you keep an eye out! Also make sure you check out my fb page for a free mini kit once a month from me!

(image linked to download)


Sneak Peek!


And I'm going to leave you with a little sneak peek of next week's all new Duo-licious collab! You wont want to miss out on this one!!