Showing posts with label hybrid. Show all posts

Friday, September 30, 2011

Hybrid Friday: Halloween Milk Carton Treat Box


Hello there! This week, my hybrid creation was inspired by this post on the hybrid chic. I created my own milk carton box using danimoy designs's Spooktacular kit. I am going to use it for our annual Halloween party :)


First, I used the milk carton template in PSE9, and created a halloween house scene. I started with an orange background paper that mimicked a siding and roofing. I used purple ribbon to make a fence, added a window with ribbon curtains inside, trees and two pumpkins, two trick or treaters and a Happy Halloween sign. Then, I printed it out on white cardstock and cut it out. I also used my paper cutter to score the folding lines for a cleaner look.


I glued the side strip down and it created the rectangular piece of the box. 


Then I simply folded the bottom pieces together to make the bottom of the box. I decided not to glue these down and leave it open, so I could later place some candies inside!


I folded and glued the top part together and ended up with this!! 


It was such a fun and easy hybrid project and it will make such a great treat box for our Halloween party too!! Thanks for looking and see you next week!  

Friday, September 2, 2011

Back To School Hybrid Printable - Check, Check, Done! Place mat


Hi danimoy fans! I have a freebie for you today :) I don't know about you but I am bittersweet about the summer being over. But, my youngest sister is entering kindergarten this year and I decided to make her a checklist placement to help her adjust and remember to pack everything she needs. 

I used danimoy's Study Buddy and Another Moment kits to create this unique organizational placement. 


So for today's project, I simply started with a 8.5 x 11 inch document in PSE and created the background to have 3 parts, with the left side for "Do at Home" and the right side for "Bring to School" checklists. I did it this way because it's organized and it can be better read while a bowl or plate is sitting in the middle. Then I created the lists on each side to have the major to-dos like get dressed, make the bed, brush teeth, etc. and I even left some space to write in those particular day reminders. Finally, I added some cool elements and the placement was complete :)


I printed it out on white card stock and laminated it. Now, my sister Carina can cross off or place a check mark next to the things she has accomplished in the morning with a dry-erase marker! Easy right?


Want your own checklist place mat? Simply download the freebie linked below, print on card stock and laminate! Don't forget to leave a comment if you like the freebie! 


See you next week for a special Friday post! 

Friday, August 5, 2011

Hybrid Friday: Cupcakes Anyone?


Hi everyone, Laina here! 


First and foremost, I'd like to remind everyone that there is 1 week left to enter our first blog challenge! We've already seen some gorgeous layouts so far. Submit your layout and enter to win a $5 danimoy designs coupon!!


Click here to find out more about the blog challenge.  


Now, on to this week's hybrid post! Cupcakes :)  I decided to make cupcake wrappers and toppers using Bahama Mama  

First, here's what you'll need:
Cupcakes (homemade or store bought)
Color Printer (with color ink)
Toothpicks
Tape
Glue (optional) 

I designed the toppers as follows: I first created a 2 inch circle and created a slightly smaller inner circle. I then placed the circle frame around the inner circle and finally placed an element in the middle. You can see I alternated the elements in the center to create 3 distinct toppers. I added shadows and here's what I came up with: 


I changed the element in the center to create 2 alternate cupcake toppers. I then placed 12 cupcake toppers on a 8.5x11 sized document and printed them out. You can see the document below: 


I used a template to make the wrappers. I clipped the orange and pink papers to each wrapper. Then, with both cupcake wrappers placed on a 8.5x11 sized document I simply printed and cut them out.  


Finally, I assembled the toppers and wrappers. I taped 1 toothpick on the back of each topper and glued the edges of the wrappers together. Here's the final decorated cupcakes! 


Thanks for looking!! 


Friday, July 22, 2011

Hybrid Friday: Butterfly Gift Tag

Photobucket

Hi danimoy fans! Laina here, I am excited to bring you our blog's first Hybrid Post. In weeks to come, I will post hybrid posts twice a month on Fridays!!

Today we are going to make a buttefly tag, perfect for gifts, made with danimoy's Flutter found here at Gotta Pixel or Scrapbook Bytes.

To complete this project, you will need:
A scrapbooking kit of our choice
Template provided
A printer with color ink
White Cardstock
Ribbon (I will use a dark blue ribbon)
A hole puncher
Small scissors/Xacto Craft Knife
Pop-up glue dots


I have provided you with a template for the tag, which you can download by following this link: Download here


Photobucket


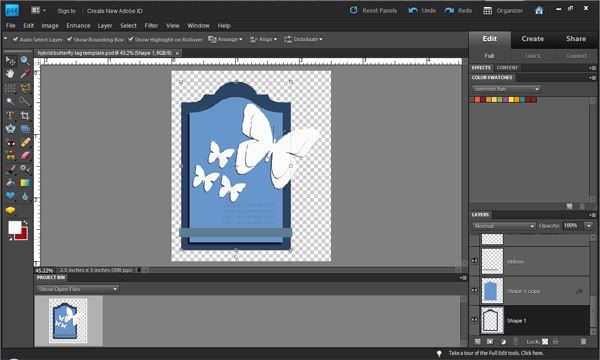
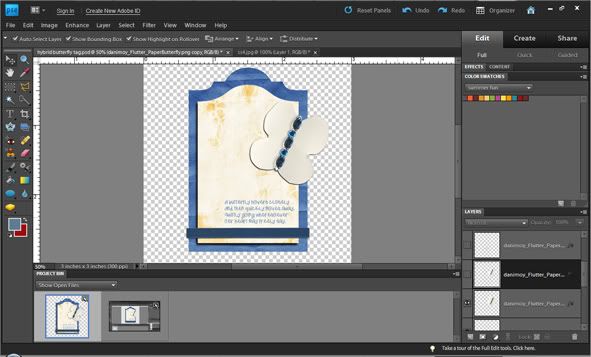
Once you have downloaded the template, you can open it up with Photoshop and begin adding your papers and elements.

Photobucket


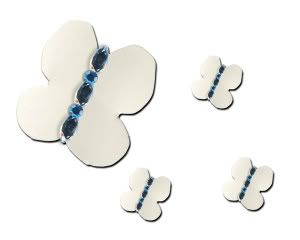
I decided to leave out the top butterfly and the three smaller butterflies out of design for now. Instead of placing them digitally, I will print them out, cut and glue down with pop-up glue dots. I made the three smaller butterflies are about 1 sq. inch in size and the larger butterfly is about 1 1/2 sq. inch in size to print. In order to figure your sizes out, you can place them on the template to get an general idea of what size element you wish to have and then create a new document with them to print, separately like my below.

Photobucket


After printing on cardstock, let the tag and additional elements dry for at least 5 minutes. Now you are ready to start assembling the gift tag!

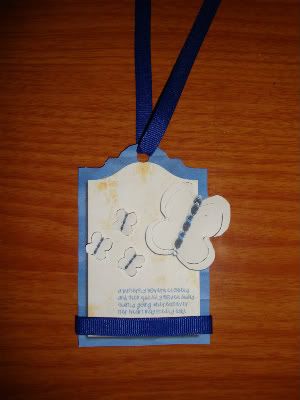
I cut out the butterflies, attached them with glue dots. I also decided last minute to add ribbon on top. Then I punched a hole at the top and threaded the ribbon through.

Here's my final butterfly gift tag!

Finished Tag

If you decide to use the template and one of danimoy's kits, we'd all love to see the results! You can post a photo of your completed hybrid project at one of her store galleries (Gotta Pixel or Scrapbook Bytes)

Photobucket